Open Source Initiative
Making Technology More Usable
Design | Build | Share

Densify
a GUI Utility Desktop Application that compresses PDF files using Ghostscript written in Python/GTK+.
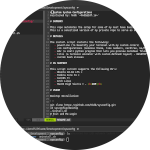
Our Projects
A list of all our other open source projects. Click on the "LEARN MORE" button below to see the full list.